Nail Art with Glitter and Rhinestones: The Ultimate Guide to Sparkling Designs
Nail Art With Glitter And Rhinestones is a fun and easy way to add some personality to your look. Whether you’re going for a subtle shimmer or a bold and glamorous statement, there are endless possibilities to create eye-catching designs. This comprehensive guide will provide you with everything you need to know about taking your nail game to the next level with these dazzling embellishments.
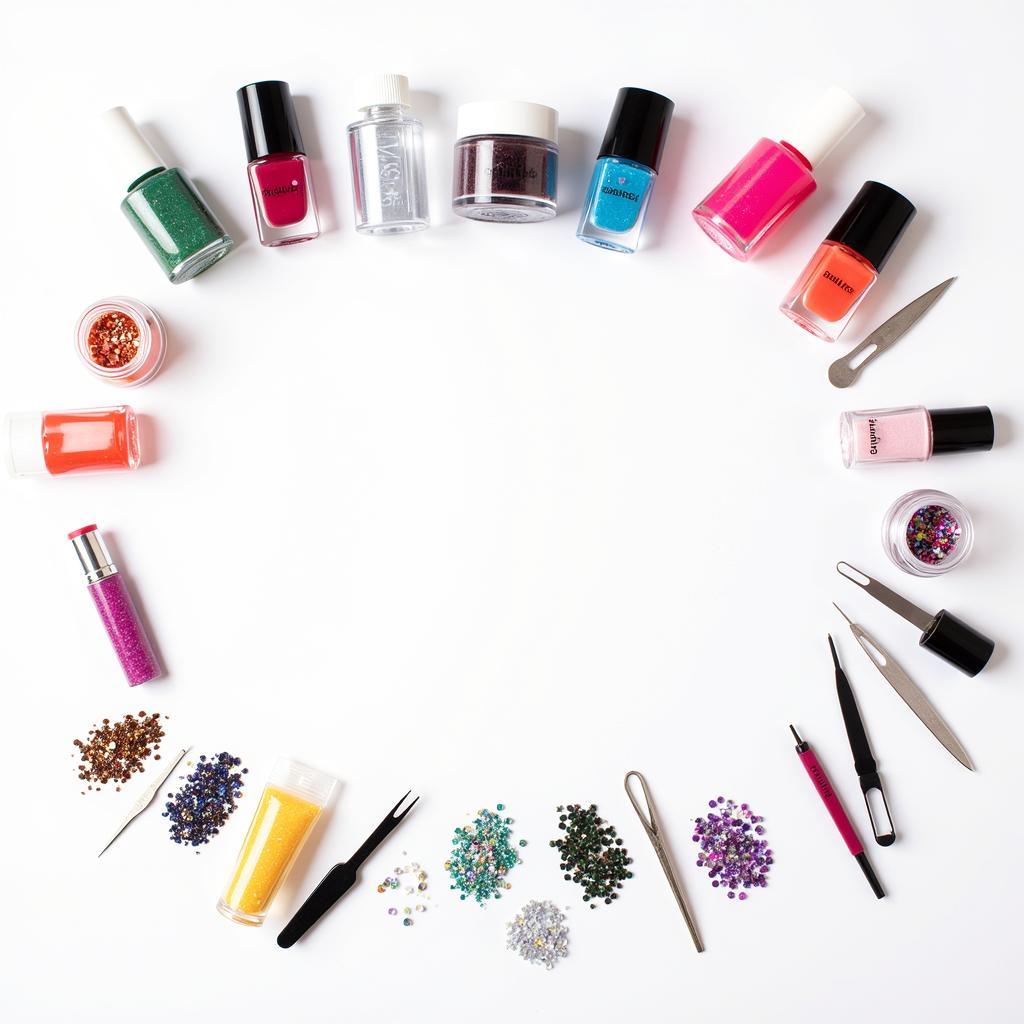
 Essential Supplies for Glitter and Rhinestone Nail Designs
Glitter vs. Rhinestones: Understanding the Difference
Before we dive into the techniques, let’s differentiate between these two dazzling elements:
-
Glitter: This refers to tiny, reflective particles that come in various shapes, sizes, and colors. From fine dust-like particles to chunky holographic flakes, glitter offers a versatile range of effects, from subtle shimmer to intense sparkle.
-
Rhinestones: These are small, faceted pieces of glass or crystal that resemble diamonds. They add a touch of luxury and glamour to nail designs and are available in an array of colors, shapes, and sizes.
Choosing the Right Glitter and Rhinestones
Glitter Types
-
Fine Glitter: Perfect for creating a smooth, subtle shimmer or for use as a base for other nail art elements.
-
Chunky Glitter: Adds a bold and textured look, making a statement with each nail.
-
Holographic Glitter: Shimmers in a rainbow of colors, adding a futuristic and eye-catching effect.
Rhinestone Selection
-
Sizes: Rhinestones come in various sizes, from tiny microbeads to larger statement pieces. Choose the size that best suits your desired design and nail length.
-
Shapes: Experiment with different shapes, such as round, square, oval, or heart-shaped rhinestones, to create unique patterns and designs.
-
Colors: Select rhinestone colors that complement or contrast with your chosen nail polish for a cohesive and stylish look.
Essential Tools for Glitter and Rhinestone Nail Art
-
Base Coat and Top Coat: Essential for protecting your natural nails and sealing in your design for long-lasting wear.
-
Nail Polish: Choose colors that complement your glitter and rhinestones, or opt for a neutral base for a versatile backdrop.
-
Tweezers: Precision tools for picking up and placing rhinestones accurately onto your nails.
-
Dotting Tool: Useful for applying small dots of adhesive or for creating intricate patterns with glitter.
-
Orangewood Stick: Helps to clean up any excess polish around your nails and to gently push back your cuticles.
Techniques for Applying Glitter and Rhinestones
Glitter Application
-
Dry Brush Technique: Dip a dry brush into the glitter pot, then gently tap off any excess. Lightly brush the glitter onto your nails for a subtle effect or build up layers for greater intensity.
-
Loose Glitter Application: Apply a layer of top coat to your nails and, while still wet, sprinkle the glitter over the top. Gently press the glitter into the top coat for better adhesion.
Rhinestone Placement
-
Adhesive: Apply a small dot of nail glue or resin to the nail where you want to place the rhinestone. Use tweezers to carefully pick up the rhinestone and place it onto the adhesive. Gently press down to secure.
-
Top Coat Method: Apply a generous layer of top coat to your nails. While still wet, use tweezers to place the rhinestones onto the top coat. Allow the top coat to dry completely.
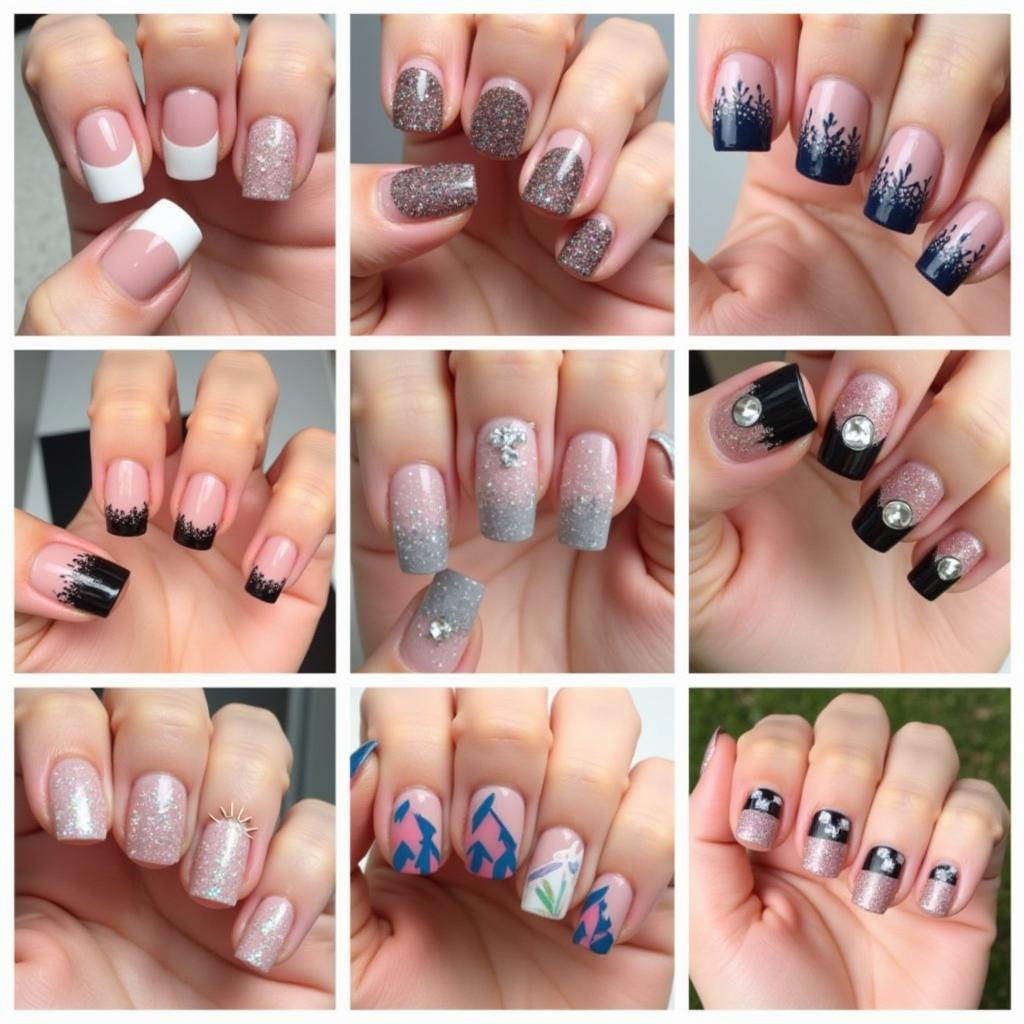
Inspirational Nail Art with Glitter and Rhinestones Ideas
-
French Manicure with a Twist: Elevate the classic French manicure by adding a line of glitter along the tip or create a sparkling half-moon design at the base of your nails.
-
Ombre Glitter Fade: Blend two or three different shades of glitter to create a mesmerizing ombre effect. Start with the darkest shade at the base and gradually fade to the lightest shade at the tips.
-
Rhinestone Accents: Use rhinestones sparingly as accents on a solid color manicure. Place a single rhinestone at the base of each nail or create a minimalist design with a few strategically placed gems.
-
Glitter Gradient: Create a stunning gradient effect by concentrating glitter at the base of your nails and gradually fading it out towards the tips.
-
Geometric Rhinestone Patterns: Arrange rhinestones in geometric shapes, such as triangles, squares, or lines, for a modern and edgy look.
-
Statement Nail: Create a focal point on your hand by embellishing one nail on each hand with an intricate design using a mix of glitter, rhinestones, and other nail art accessories.
 Variety of Nail Designs with Glitter and Rhinestones
Tips for Long-Lasting Glitter and Rhinestone Nail Art
-
Proper Preparation: Ensure your nails are clean, dry, and free of any oils or lotions before applying any polish.
-
Thin Coats: Apply both your base coat and top coat in thin, even layers to prevent chipping and to create a smooth surface for the glitter and rhinestones.
-
Sealing the Edges: When applying your top coat, remember to cap the edges of your nails by running the brush along the free edge. This helps to prevent the glitter and rhinestones from catching on clothing or hair and promotes longer wear.
-
Drying Time: Allow ample drying time between each layer of polish and after applying the glitter and rhinestones to prevent smudging or shifting.
-
Maintenance: Avoid prolonged exposure to water and harsh chemicals, such as cleaning products. Wear gloves when doing dishes or other chores to protect your dazzling manicure.
Conclusion
Nail art with glitter and rhinestones allows you to unleash your creativity and express your personal style. From subtle shimmer to dazzling glamour, there are endless possibilities to create unique and eye-catching designs. With the right tools, techniques, and a touch of imagination, you can transform your nails into miniature works of art that sparkle and shine. Don’t be afraid to experiment and have fun with it!
Frequently Asked Questions (FAQs)
How do I prevent glitter from getting everywhere when applying it to my nails?
To minimize glitter fallout, try the “tray method.” Place a sheet of paper underneath your hands to catch any loose glitter. You can then easily funnel the excess glitter back into its container.
What is the best way to remove rhinestones from my nails?
Soak a cotton ball in 100% acetone nail polish remover and press it against your nail for a few minutes to soften the adhesive. Gently slide the rhinestones off using an orangewood stick or the edge of your tweezers.
Can I use regular clear nail polish to secure rhinestones?
While regular clear nail polish can provide some hold, it’s best to use nail glue or resin specifically designed for adhering nail art embellishments. These adhesives offer a stronger bond and will help your rhinestones last longer.
My glitter nail polish always feels rough after it dries. What am I doing wrong?
You might not be applying enough top coat. Apply two coats of top coat, ensuring you smooth it over the glitter for a smooth and even finish.
Where can I find inspiration for nail art with glitter and rhinestones?
Social media platforms like Instagram and Pinterest are treasure troves of nail art inspiration. Search for hashtags like #glitternails, #rhinestonenails, or #sparklynails.
Need help with your nail art journey?
For personalized advice and expert guidance, don’t hesitate to contact our team. Call us at 02462573573, email us at danteum@gmail.com, or visit us at Savico Megamall, 7-9 Đ. Nguyễn Văn Linh, Gia Thụy, Long Biên, Hà Nội 10000, Việt Nam. Our dedicated customer support team is available 24/7 to assist you.
Explore more creative nail art ideas on our website:
-
Want to add unique designs to your nails? Check out our nail art sticker collection.
-
Elevate your nail game with dazzling accessories! Learn more about nail art with accessories.
-
Looking for the perfect nail art gift? Discover our Mother’s Day nail art designs ideas.
-
Want to master the art of nail design? Find nail art classes near me.


