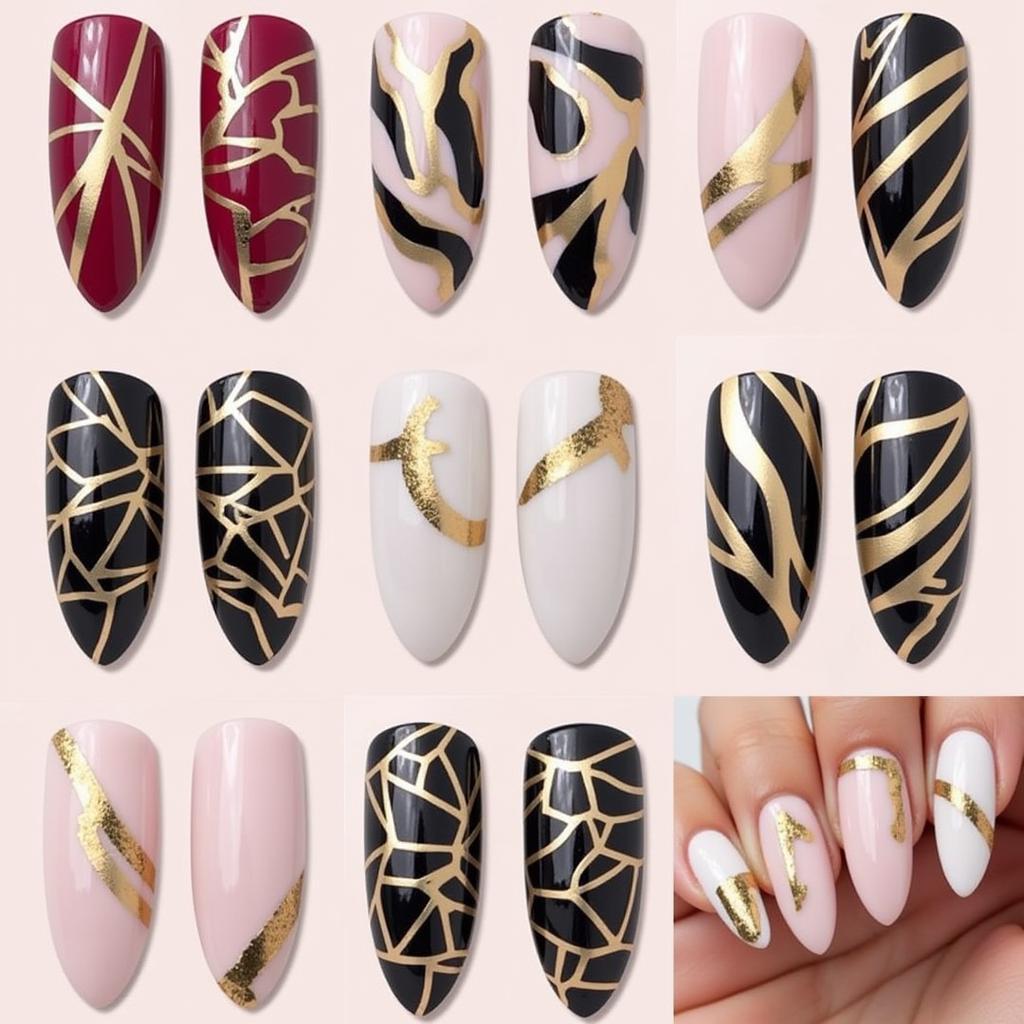
Nail Art Foil: Your Guide to Shiny, Mesmerizing Manicures
Nail Art Foil has taken the beauty world by storm, offering a simple yet stunning way to elevate your manicures from basic to breathtaking. This versatile material opens a world of creative possibilities, allowing you to achieve a spectrum of effects from subtle shimmer to bold metallic statements. Whether you’re a seasoned nail art enthusiast or a curious beginner, this comprehensive guide will equip you with everything you need to know about nail art foil, from application techniques to inspiring design ideas.
 A variety of nail art foils in different colors and finishes.
Understanding Nail Art Foil: What Exactly is it?
Nail art foil is an ultra-thin, pigmented sheet available in a dizzying array of colors, finishes, and patterns. Unlike traditional nail polish, foil is not applied as a liquid. Instead, it is pressed onto the nail’s surface, transferring its pigment and creating a unique, eye-catching effect.
Why Choose Nail Art Foil?
There are many reasons why nail art foil has become a staple in many nail technicians’ kits and DIY nail enthusiasts’ collections.
- Versatility: From minimalist accents to intricate designs, the possibilities with nail art foil are truly endless.
- Ease of Use: Applying nail art foil is surprisingly simple, even for beginners.
- Durability: When applied correctly, nail art foil can last for weeks, making it a long-lasting nail art option.
- Eye-Catching Results: The reflective, shimmering finish of nail art foil adds a touch of glamour and dimension that’s hard to achieve with traditional nail polish.
Types of Nail Art Foil: Exploring the Options
Navigating the world of nail art foil can feel overwhelming with the multitude of options available. Here’s a breakdown of the most common types:
- Sheet Foil: This type comes in larger sheets, allowing you to cut custom shapes and sizes for unique designs.
- Transfer Foil: This pre-designed foil comes with adhesive backing, making it incredibly easy to apply intricate patterns.
- Crinkled Foil: As the name suggests, this foil features a crinkled texture, perfect for creating abstract, edgy looks.
- Holographic Foil: This foil type reflects a rainbow of colors, adding a mesmerizing, futuristic touch.
Mastering the Art: How to Apply Nail Art Foil
Applying nail art foil may seem intimidating, but it’s a surprisingly straightforward process. Here’s a step-by-step guide:
- Prep Your Nails: Start with clean, dry nails. Shape and file your nails to your desired length and shape.
- Apply Base Coat: A base coat protects your natural nails and provides a smooth surface for the foil to adhere to.
- Apply Color (Optional): If you prefer a colored base, apply your chosen nail polish and let it dry completely.
- Apply Foil Glue: This specialized glue is designed to hold the foil securely. Apply a thin layer to the areas where you want the foil to adhere.
- Apply the Foil: Once the glue becomes tacky (not completely dry), gently press the foil onto the nail, using your finger or a silicone tool to smooth it down and ensure proper adhesion.
- Peel Away the Foil: Carefully peel away the foil to reveal the design. If some areas didn’t transfer completely, simply repeat steps 5 and 6.
- Seal with a Top Coat: Protect your masterpiece with a durable top coat. This will enhance the shine and prevent chipping.
Expert Insight:
“Don’t be afraid to experiment with different types of foil and application techniques to discover what works best for you. The beauty of nail art lies in its endless creative potential.” – Elena Martinez, Celebrity Nail Artist
Troubleshooting Common Issues
- Foil not sticking? Ensure the foil glue is tacky, not completely dry, before applying the foil.
- Bubbles appearing? Smooth out any air bubbles by gently pressing the foil onto the nail surface using a silicone tool.
- Foil chipping quickly? Make sure to seal the edges of the foil with a top coat to prevent lifting and chipping.
Beyond the Basics: Inspiring Nail Art Foil Design Ideas
Ready to get creative? Here are a few design ideas to spark your imagination:
- Geometric Accents: Create modern, minimalist looks by applying foil in geometric shapes like triangles, squares, or stripes.
- Foil Tips: Elevate a classic French manicure with a touch of glamour by applying foil to the tips of your nails.
- Abstract Art: Embrace imperfection by using crinkled foil to create abstract, one-of-a-kind designs.
- Negative Space Nail Art: Leave portions of your nails bare for a trendy and minimalist look that highlights the foil.
 Showcase of trendy nail art designs using foil.
Conclusion
Nail art foil offers a captivating way to express your unique style and add a touch of glamour to your fingertips. With a little practice and a dash of creativity, you can master this versatile nail art technique and create stunning manicures that turn heads. So, go ahead, explore the world of nail art foil, and unleash your inner artist!
