Foil Nails Art: The Ultimate Guide to Shiny and Stunning Nails
Foil nail art is a trendy and eye-catching way to elevate your manicure from simple to stunning. This technique involves applying thin pieces of foil to your nails, creating a range of effects from mirror-like chrome to intricate designs. Whether you’re a seasoned nail art enthusiast or just starting, this comprehensive guide will equip you with all the knowledge and inspiration you need to master the art of foil nails.
What is Foil Nail Art?
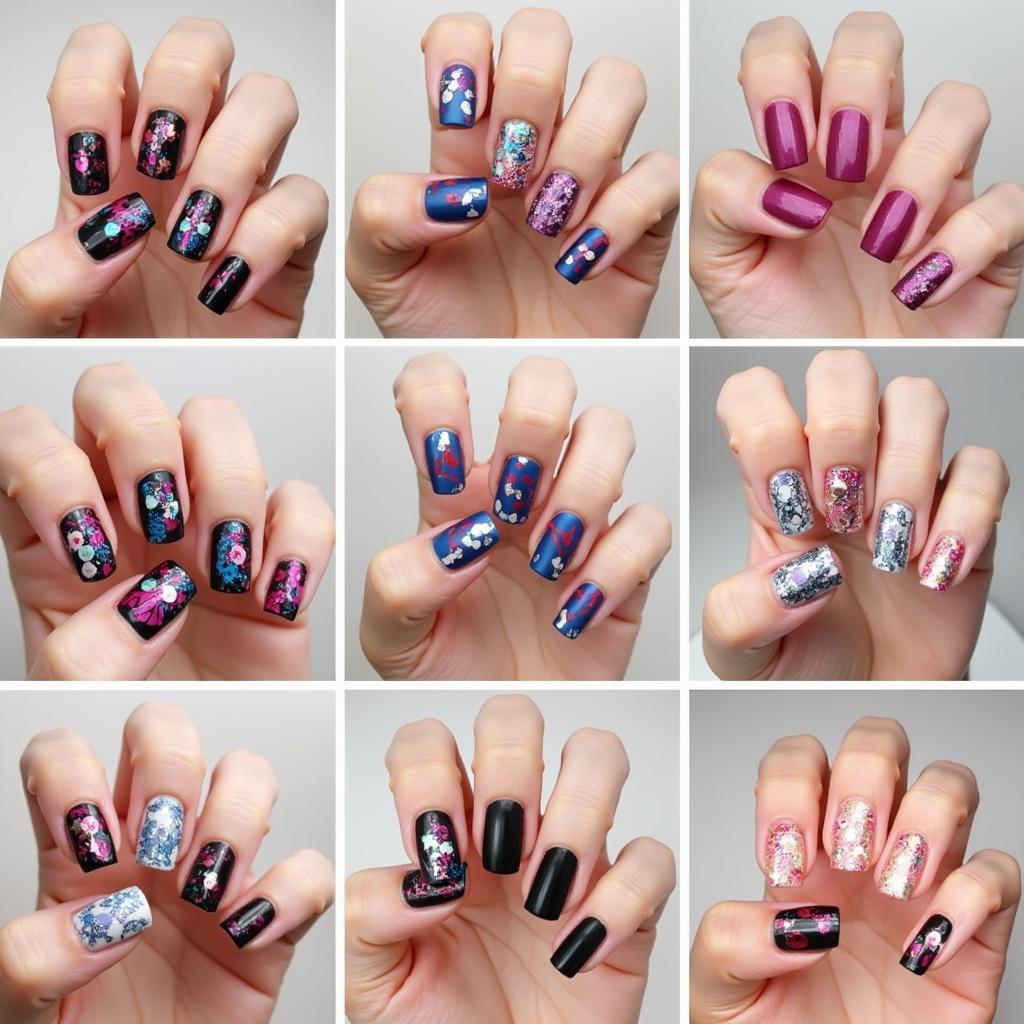
 Foil Nails in Different Colors and Designs
Foil nail art involves adhering thin, pigmented foil sheets onto your nails, either partially or fully, to create dazzling effects. These foils come in a myriad of colors, patterns, and finishes, ranging from classic gold and silver to holographic, iridescent, and even embossed textures.
Types of Foil for Nail Art
Choosing the right foil for your desired look is key to achieving stunning results. Let’s explore some popular options:
-
Transfer Foil: This type of foil requires adhesive and is transferred to the nail by pressing and peeling. It offers a wide range of colors, patterns, and finishes, making it perfect for intricate designs. To explore different foil options for nail art designs, click here.
-
Embossed Foil: As the name suggests, this foil features raised patterns that transfer onto the nail, adding a unique textural element to your manicure.
-
Crinkled Foil: Crinkled foil creates a shattered glass effect, adding a touch of edgy glamour to your nails.
-
Striped Foil: This foil comes in various widths and colors, allowing you to create precise lines and geometric designs.
Essential Tools for Foil Nail Art
Before you embark on your foil nail art journey, gather these essential tools:
- Foil Sheets: Choose your desired colors, patterns, and finishes.
- Nail Foil Glue: This specialized adhesive ensures the foil adheres smoothly and securely to your nails.
- UV or LED Lamp: If using gel polish or top coat, you’ll need a lamp for curing.
- Orange Wood Stick: Ideal for pressing down the foil and cleaning up any excess.
- Cuticle Pusher: Gently pushes back cuticles for a clean and polished look.
How to Apply Foil on Nails: A Step-by-Step Guide
Follow these steps to achieve flawless foil nail art:
- Prep Your Nails: Shape your nails, gently push back your cuticles, and lightly buff the surface of your nails for better adhesion.
- Base Coat: Apply a thin layer of base coat to protect your natural nails and prevent staining. Cure under your lamp if using a gel base coat.
- Color Coat: Apply two thin coats of your chosen nail polish color, curing each layer under the lamp if necessary.
- Apply Adhesive: Once your color coat is dry, apply a thin layer of foil glue to the areas where you want to place the foil.
- Apply Foil: Carefully place a piece of foil onto the tacky adhesive, pressing firmly with your finger or an orange wood stick.
- Peel and Repeat: Once the foil is securely adhered, peel it away in a swift motion. Repeat steps 4-6 for additional foil applications.
- Top Coat: Seal your design with a durable top coat, curing under the lamp if using gel. For long-lasting wear and a high-gloss finish, consider using art gel for nails.
Foil Nail Art Designs: Unleash Your Creativity
The possibilities with foil nail art are endless. Here are some ideas to spark your inspiration:
1. Geometric Accents
Use striped foil or cut shapes from transfer foil to create modern geometric patterns. Combine different colors and finishes for a bold and edgy look.
2. Minimalist Foil Tips
For a touch of understated elegance, apply foil only to the tips of your nails, leaving the rest bare or with a sheer nude polish.
3. Foil French Manicure
Give the classic French manicure a modern twist by using foil instead of white polish for the tips. Experiment with different foil colors and finishes for a unique touch.
4. Abstract Foil Art
Embrace abstract art by randomly applying small pieces of foil in different colors and textures. This creates a unique and eye-catching effect.
5. Foil and Glitter Combination
Combine the shine of foil with the sparkle of glitter for a dazzling and glamorous manicure. Apply glitter polish as a base and accent with foil designs. For a wide selection of nail art powder glitter, explore our online store.
Tips for Long-Lasting Foil Nails
- Smooth Surface: Ensure your base coat and color coat are completely smooth and free of any bumps or ridges before applying the foil.
- Thin Layers: Apply thin layers of adhesive and top coat to prevent the foil from wrinkling or lifting.
- Cap the Edges: When applying top coat, remember to cap the edges of your nails to seal the foil completely and prevent chipping.
Foil Nail Art FAQs
1. Can I use regular glue for foil nail art?
Regular glue is not recommended as it lacks the specific properties needed to adhere the foil properly and may damage your nails. Always use nail foil glue for optimal results.
2. How do I remove foil nail art?
Foil nail art can be easily removed with regular nail polish remover. Soak a cotton pad with remover and hold it against your nail for a few seconds before gently wiping away the foil.
Conclusion
Foil nail art is a fun and creative way to elevate your manicure and express your personal style. With a little practice and the right tools, you can create stunning and intricate designs that will turn heads. Don’t be afraid to experiment with different colors, patterns, and techniques to discover your signature foil nail art look.
Need expert advice or have questions? Contact us at 02462573573, email us at [email protected], or visit our store at Savico Megamall, 7-9 Đ. Nguyễn Văn Linh, Gia Thụy, Long Biên, Hà Nội 10000, Việt Nam. Our dedicated customer support team is available 24/7 to assist you.


