Creating Festive Cheer with Christmas String Art
Christmas String Art is a fun and festive way to add a personal touch to your holiday decor. Whether you’re a seasoned crafter or a beginner, this step-by-step guide will show you how to create stunning string art pieces that will impress your guests and add a touch of handmade charm to your home.
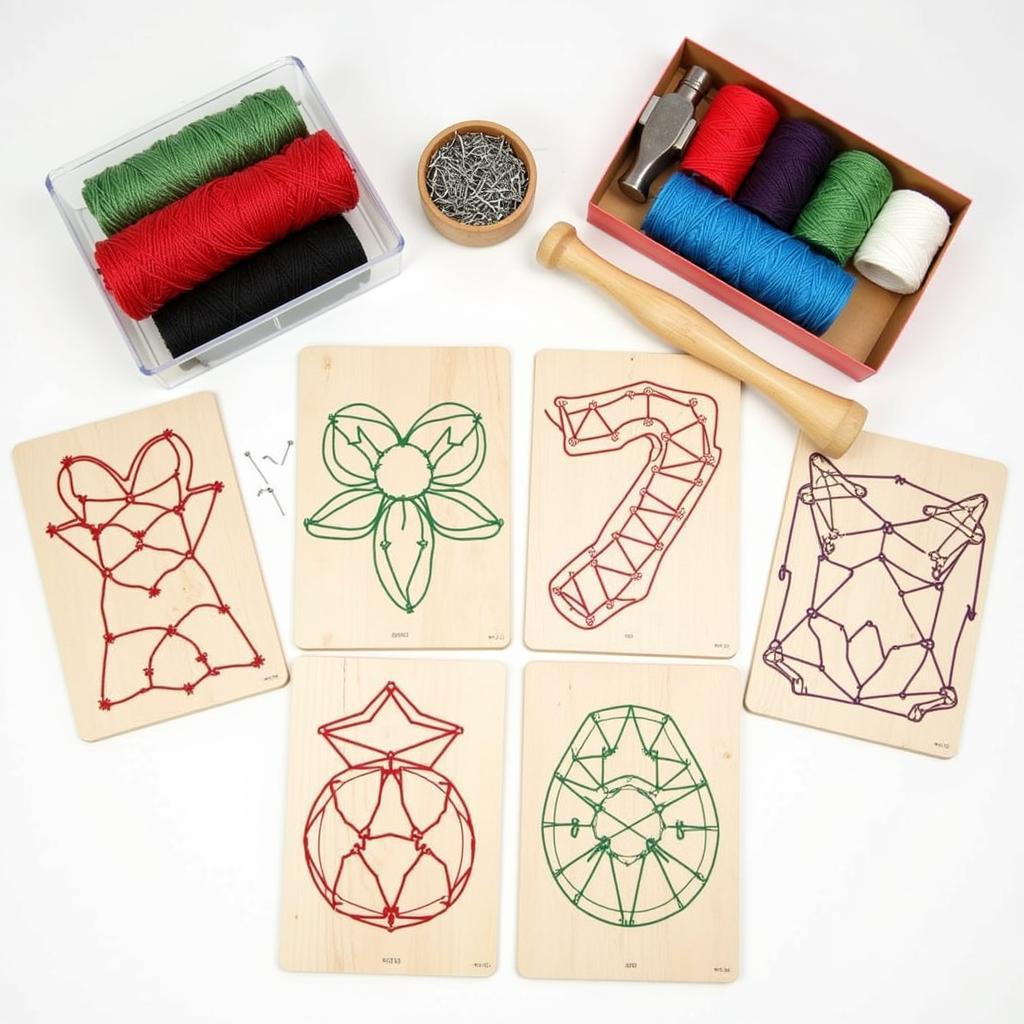
 Christmas String Art Supplies
Getting Started with Christmas String Art
Before we dive into the creative process, let’s gather our materials. You’ll need:
- Wooden board: Choose the size and shape that suits your design.
- Nails: Small nails with a head work best for string art.
- Hammer: Use a hammer that is comfortable to hold and provides good control.
- String or yarn: Opt for colorful embroidery floss, yarn, or even metallic thread for a touch of sparkle.
- Template: You can find free printable christmas string art patterns online, or let your imagination run wild and create your own.
- Pencil: For transferring your design onto the wood.
- Scissors: For trimming the string.
- Optional: Paint, sandpaper, and other decorative elements to customize your creation.
Designing Your Christmas String Art Masterpiece
Choosing the Perfect Christmas String Art Pattern
The beauty of Christmas string art lies in its versatility. From simple snowflakes to intricate reindeer, the possibilities are endless.
- Classic Christmas Tree String Art: A timeless choice that embodies the spirit of the holidays. christmas tree string art pattern come in various complexities, allowing you to choose one that aligns with your skill level.
- Festive Ornament String Art: Create a collection of charming ornaments with string art. Experiment with different shapes, colors, and sizes to add visual interest to your Christmas tree.
- Whimsical Christmas Character String Art: Bring your favorite Christmas characters to life with string art. Santa Claus, Rudolph, and playful elves are just a few ideas to get you started.
Creating Your Own Custom Design
If you’re feeling adventurous, don’t hesitate to design your own Christmas string art pattern! Sketch out your ideas on paper first, keeping the string art technique in mind. Simple geometric shapes and outlines often translate well into striking string art designs.
Bringing Your Christmas String Art Vision to Life
Now that you have your materials and design ready, it’s time to start creating!
- Prepare your board: Sand down any rough edges and paint it if desired. Allow the paint to dry completely.
- Transfer your design: Place your chosen template onto the board and secure it with tape. Using a pencil, lightly trace the outline of the design onto the wood.
- Hammer time: Carefully hammer nails along the traced lines, spacing them evenly. For intricate designs, use smaller nails and place them closer together.
- String it up: Tie a knot around one nail to secure the starting point of your string. Begin wrapping the string around the nails, following your design.
- Creative wrapping: There are no strict rules when it comes to wrapping the string. Experiment with different techniques to achieve the desired effect.
- Finishing touches: Once you’re satisfied with your design, tie off the string securely at the back of the board. Trim any excess string.
Tips and Tricks for String Art Success
- Use a thimble: Protect your fingers from the hammer by using a thimble while hammering nails.
- Start simple: If you’re new to string art, begin with a simple design to get the hang of the technique.
- Play with colors: Don’t be afraid to experiment with different colors of string or yarn to create unique and eye-catching pieces.
- Get creative with backgrounds: Instead of leaving your wooden board plain, consider painting it with a festive background color or pattern.
- Add embellishments: Once your string art is complete, personalize it further by adding beads, sequins, or other decorative elements.
 Displaying Finished Christmas String Art
Conclusion
Christmas string art is a rewarding and enjoyable way to unleash your creativity and spread holiday cheer. By following these simple steps and infusing your own personal style, you can create stunning pieces that will become cherished decorations for years to come. So gather your supplies, choose your favorite christmas tree string art pattern, and let the festive crafting begin!
FAQs
What kind of nails are best for Christmas string art?
Small nails with heads work best as they provide a good surface area for the string to catch on.
Can I create Christmas string art without a template?
Absolutely! While templates provide guidance, feel free to unleash your creativity and design your own patterns.
What can I do with my finished Christmas string art?
Display your creations on walls, mantels, or even use them as unique gift tags.
Need help with your project?
Contact us at Phone Number: 02462573573, Email: danteum@gmail.com or visit us at Savico Megamall, 7-9 Đ. Nguyễn Văn Linh, Gia Thụy, Long Biên, Hà Nội 10000, Việt Nam. We have a 24/7 customer support team.
For more inspiration and patterns, check out our article on christmas tree string art template and explore the fascinating world of directions in art.


